
 |  |  |  |  |  |
| TWILIGHT |
Welcome back aboard to the second part of the environment lighting series for Autodesk Maya 8.5. Again, we will be using mental ray for Maya for this challenging interior illumination, so all you need for the this is to get your CPU at operating temperature and the basic maya scene of our ship's interior. |
|
Before we can start, we need to properly set the project (Fig. 1). If you're not familiar with the use of projects, you might want to know that (one of) the main reasons for doing this is because of the relative texture paths Maya uses. These relative paths ensure that we can port the scene from one file location (e.g. my computer) to another (your computer) without any hassle, as opposed to absolute paths which would always point to a static location that might differ from system to system. |
|

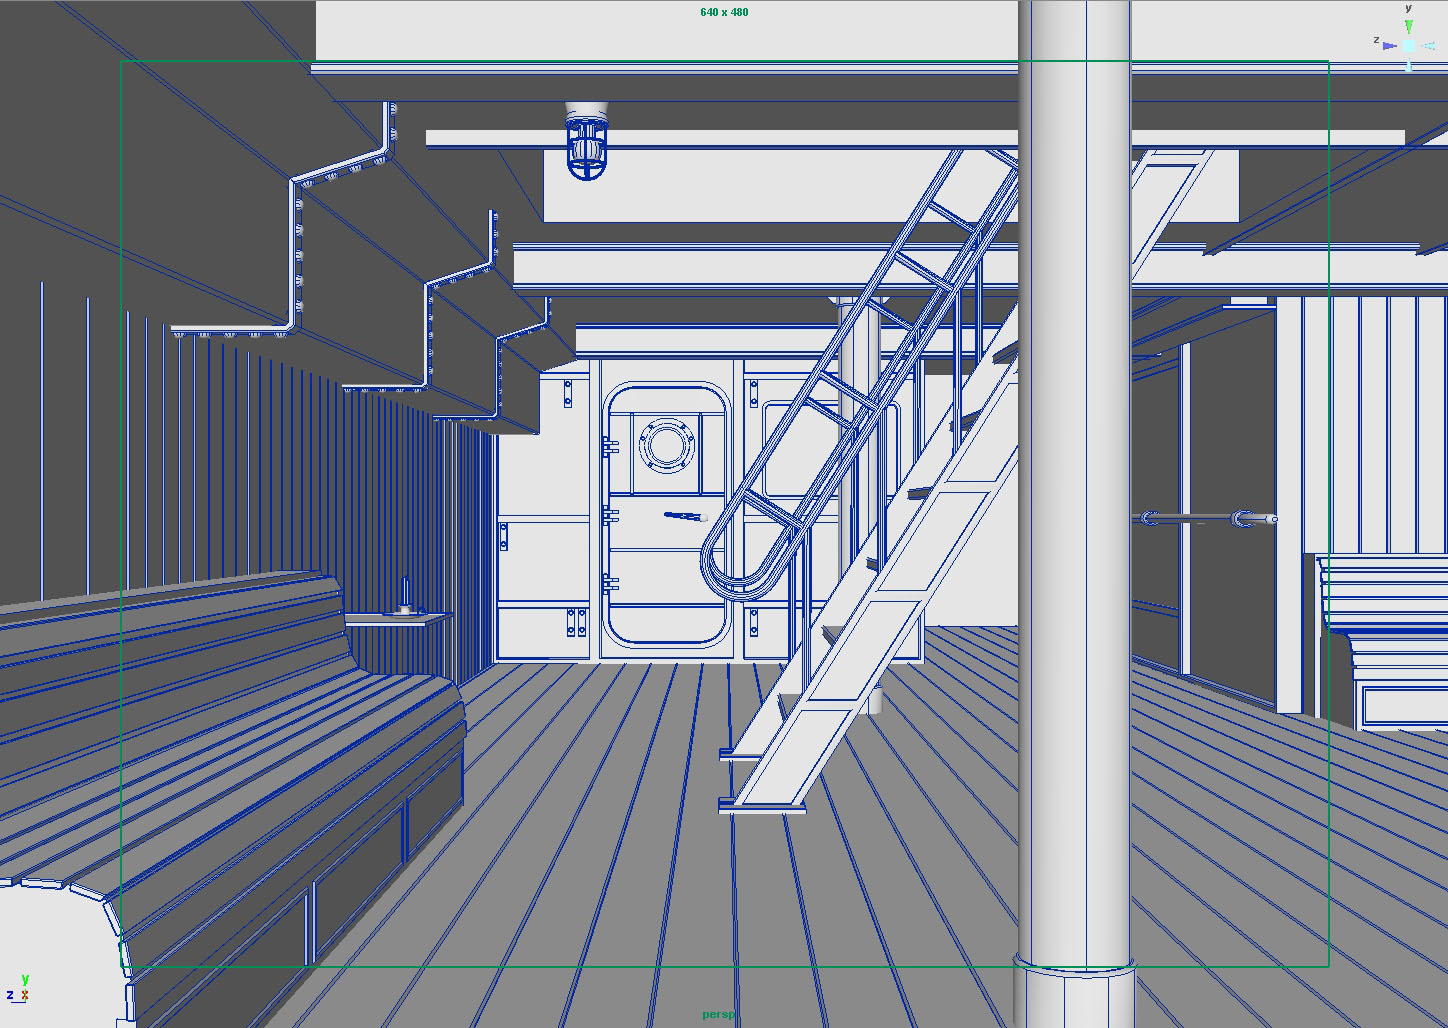
So we're back aboard the MS No-Frills, still anchored somewhere in the Mediterranean Sea (Fig. 2). For this second tutorial, we will set our goals for accomplishing a twilight atmosphere, which would usually occur at either dusk or dawn. Before we actually look at the scene, let's take a few moments to think about this very special situation (you might want to skip or come back later to this paragraph if you want to go straight to the execution). Twilight, from a technical point of view, is the time (usually around half an hour) before sunrise or after sunset. In this condition the sun itself is not visible; the sun's light is however scattered towards the obeserver in the high layers of the atmosphere, either by the air itself (Rayleigh-scattering) or aerosols. This scattering effect causes the beautiful and different colors that we enjoy every dusk or dawn. From an artistic point of view, twilight may happen in a variety of occasions, for example in stormy weather, or when natural and artificial light sources meet - typically whenever two (thus “twi-”) light sources or light conditions compete for predominance (imagine two wrestlers intensely fighting on the floor, and it's absolutely impossible to tell who's going to win the fight). Twilight always has this dramatic sense to it, and often the dramatic colors as well. In case of a storm, they might even range from greenish to deep blue. Usually, in the case of dusk and dawn, colors range from blue to purple, and from yellow to orange and red. The crux is that these colors are mostly equally dominant (and therefore leave us with great artistic and interpretational freedom) - as opposed to any other lighting condition, where there is usually one light source which is predominant. With this in mind, we are now ready to simulate the very particular case of twilight. We will use the same base scene as used for part 1 of this tutorial (the sunny afternoon), so all shaders and textures are ready to rumble. All surface shaders are made from the mia_material that ships with Maya 8.5 (you might want to read back to the “note on shading” in part 1 - sunny afternoon - which explains its basic functionality). |
|
Again, we are using the newly introduced physical sun and sky system, which can easily be created from the render globals (Fig. 3). This button saves us time setting up all the nodes and connections to make the system work properly (thus it also turns final gathering ON). It basically consists of three things: |
|

The sun, whose direction we control using the directional light (called sunDirection, by default) with it's light shader mia_physicalsun; the sky, which consits of an environment shader (mia_physicalsky) connected to the camera; and a simple, yet effective, so-called tonemapper (mia_exposure_simple), used as a lens shader on the camera (Fig. 4). |
|

Before we start rendering, let's firstly think about a reasonable sun direction that would fit our needs for twilight. It is very tempting to actually use an angle that leaves the sun below the horizon line, however this would yield a diffuse, not very dramatic lighting. You might want to experiment with this a little, but I have decided to have a more visible indication of where the sun actually is. I rotated the sun on X -12.0 Y 267.0 Z 0.0; this makes the direct sunlight shine through the back windows, still providing a very flat angle (Fig. 5). There's still one important point that we should consider before pushing the render button: the color space. As already explained in the “note on the color space” in the first tutorial (sunny afternoon), we should make sure we work in a correct space, which is sRGB, or in our case an sRGB closely approximating 2.2 gamma curve. |
|

The mia_exposure_simple already puts us into this space by default (The Gamma attribute defaults to 2.2), but by doing it this way, we double the gamma on our filetextures, which by default are already in sRGB - that's a big secret no-one may have ever told you before, but trust me - it's like that. So we either need to remove the gamma from our textures (“linearize” them) before rendering, which can be done with a gammaCorrect node in front of them in the shader chain with Gamma set to 1/2.2, which is 0.455 rounded (important: the gammaCorrect node works inversedly - the value we put in there is the desired gamma compensation value, not the actual gamma function itself!), OR we can use mental ray's internal gamma correction mechanism - which I prefer. So we abandon the mia_exposure_simple's gamma correction, simply by setting its Gamma attribute to 1.0, and enable mental ray's mechanism by setting the primary framebuffer's Gamma to 1/2.2 = 0.455, in the render globals (Fig. 6). |
|

So we're ready to go and do the first test rendering (Fig. 7). As you can see the scene is pretty dark and has a few errors caused by the insufficient ray depths. However, we are still using the render globals default Draft quality preset... |
|

Let's now increase the raytracing depths to a reasonable amount (Fig. 8). The values you see in Fig. 8 should satisfy our requirements; we might increase the reflection depth later on... |
|

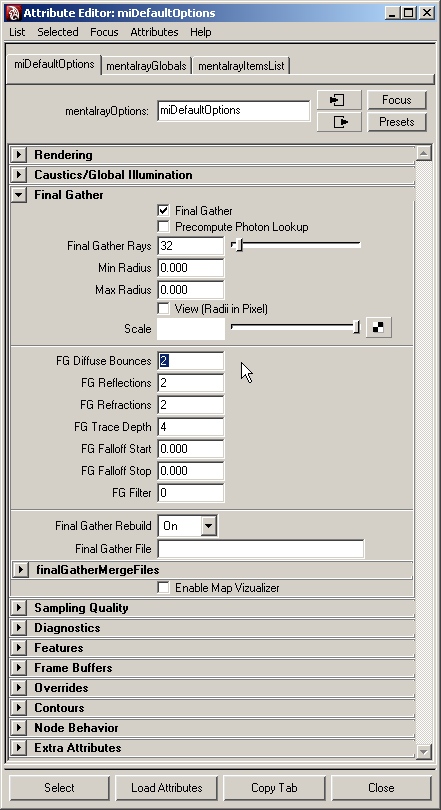
I also tweaked the final gathering settings to a lower quality (Fig. 9). This way, we get a fast converging - yet meaningful - indirect illumination for our preview renders. But besides lowering the general final gathering quality, I increased its trace depths, and, more importantly, turned the Secondary Diffuse Bounces button on. This button however only gives us a single bounce of diffuse light, as that's how they designed the render globals, but as I'm not satisfied with that let's go under the hood of the mental ray settings... |
|

We are selecting the miDefaultOptions node (for example by typing “select miDefaultOptions” without the quote marks in the MEL command line) (Fig. 10). This node is basically responsible for the export of all the settings to mental ray. The regular render globals are practically a more user friendly “front-end” to the miDefaultOptions. There's also some stuff in the mentalrayGlobals node, but this does not affect us right now. As you can see, the FG Diffuse Bounces attribute is actually exposed; we set it to our desired depth, which is 2 for now. |
|
It looks better, but still appears to be seriously under exposed (Fig. 11). There are several ways to adjust the general exposure level in mental ray for maya, but let's choose the easiest one: raising the Gain attribute of our mia_exposure_simple... |
|

You can navigate to the mia_exposure_simple either by selecting your camera (to which it is connected), or by opening the hypershade and selecting it from the Utilities tab. I gave it a serious punch and boosted the Gain to 4.0 (Fig. 12). |

Now it's much better from an exposure point of view, but it looks very cold and not very twilightish (Fig. 13). You might want to experiment with the sun's direction, but if we overdo this then we will loose the nice light which is playing on the floor. I therefore decided to solve the problem using the mia_physicalsky - the environment shader which is responsible for pretty much the entire lighting situation. |
|

I upped the Haze parameter to 2.0, which gives us a nice “equalization” of direct light coming from the sun, and the light intensity of the sky (Fig. 14) At lower haziness, the sunlight would be too dominant for our twilight atmosphere. I then shifted the Red/Blue attribute towards reddish, to achieve a warmer look (if I wanted to shift it towards blueish, i.e. doing a white balance towards a cooler temperature, I would have to use a negative value for the Red/Blue shift). I also slightly increased the Saturation, which is pretty much self explanatory. Now, for an interesting little trick to make the whole lighting situation more sunset/sunrise-like, whilst still maintaining the direct light on the floor (i.e. the actual light angle), I increased the Horizon Height to 0.5. This not only shifts the horzizon line but also makes the whole sky system think that we have a higher horizon, and thus provides a more accentuated sunset/sundawn situation. Remember this does not have too much of an effect, yet it's still an interesting way to tune the general look. The last two things I changed were the Horizon Blur and the Sun Glow Intensity, however both of these attributes dont have much of a visible effect on the general illumination of our interior. |
|

Once we're finished setting up the basic look, we can go about configuring the render globals for the final quality (Fig. 15). First of all, let's increase the final gathering quality, since we can reuse the final gathering solution later on. In Fig. 15 you can see the values I used - 64 for accuracy, which means each final gather point shoots - in a random manner - 64 rays above this point's hemisphere (less accuracy would give us a higher chance of a blotchy final gathering solution). To work against the blotchiness we could also increase the Point Interpolation to really high values, like 100+, but this would most likely wash out the whole contrast and detail of our indirect illumination if we dont have a sufficient Point Density value. The Point Density - in conjunction with a reasonable Point Interpolation - is the most responsible part in achieving nicely detailed shadowing, and so we have to find a good correlation between these two. In our case, I found it sufficient to have a Point Density of 2.0 and a Point Interpolation of 50. You might want to try a density of 1.0 (or even 0.5) if you think the former settings take too long to calculate, but you'll surely notice the lack of detail in the indirect illumination. Note that increasing/decreasing the interpolation does not affect the final gathering calculation time at all. It also does not hurt the actual rendering time too much. The crucial value is the point density which adds to calculation time, as well as the accuracy. Also note that you might be able to comfortably experiment with the Point Interpolation if you freeze the final gathering solution (set Rebuild to Freeze). |
|

It looks much better now, but there are still some areas that seriously lack detail, such as the door region (Fig. 16). To reveal these details we could render a simple ambient occlusion pass and multiply it over in post production. This would accentuate the problem areas, but at the same time it would add this typical all-present, physically incorrect and visually displeasing ambience. To overcome this, and still use the advantage of ambient occlusion, we can use the mia_material's internal ambient occlusion mode... |
|

We simply need to enable it in the shader, and set the Detail attribute to ON (which it is by default) (Fig. 17). This special ambient occlusion mode is intended to enhance the problem areas' details, where the point density might still not suffice. |
|

To enable the ambient occlusion in all shaders, we simply select them all from the hypershade and open the attribute spread sheet, from Window > General Editors > Attribute Spread Sheet (Fig. 18). There we navigate to the attribute called Ao_on and set its value to 1 (ON). |
|

Although it still might be physically incorrect, it reveals all the details that the final gathering was not able to cover (Fig. 19). Of course, it still looks very coarse, and this is mainly because the general sampling settings are still at extremely low values. |
|

To ensure nice edge antialising, as well as better shadow and glossy sampling, we set the min/max sample levels to 0/2 and the contrast values each to 0.05 (Fig. 20). The filter should be changed, too; I chose Mitchell for a nicely sharp image. I'm also raising the Reflection Gloss Samples (Refl_gloss_samples) up to 8 in the mia_materials. Note that this happens on a per shader basis, and we can use the attribute spread sheet again to do this all at once for all shaders. |
|

Last time we rendered to a full 32bit floating point framebuffer. This time, for my final render, I chose to render to a 16bit half floating point framebuffer (Fig. 21). The 16bit half takes less storage (and bandwith) but still provides the increased dynamic range of floating point buffers. If we want to render the floating point buffer right out of the GUI, wihtout batch rendering, we need to make sure the data written into the buffer actually is floating point; thus the Preview Convert Tiles in the Preview tab of the render globals needs to be switched ON, and the Preview Tonemap Tiles option needs to be switched OFF. This will produce funky colors in your render view preview, but the image written to disk (typically in your project's images\tmp folder) should be alright. |
|

The use of a 16bit half framebuffer forces us to use ILM's OpenEXR format, as it is the only supported format right now for this particular kind of framebuffer (Fig. 22). That's not actually bad, since OpenEXR is a very good and nowadays widely used format. |
|

Here's the final rendered, raw image (Fig. 23) - a good base for the post production work. |
|

In my final interpretation I decided to exaggerate the colors that make a dramatic twilight atmosphere (Fig. 24). Again, there is no painting happening, only color enhancement which done using Adobe Lightroom 1.0. I hope you enjoyed following this second part of the series as much as I have enjoyed writing it. Stay tuned for part 3 where we will be covering an extremely interesting and no less challenging lighting situation: moonlight. |
|
Credits: Original concept and geometry - Richard Tilbury Original idea - Tom Greenway Editor - Chris Perrins Tutorial - floze |

| | | | | |
You're a God..
ReplyDeleteindeed he is
ReplyDeletethank you sir!!
kiven from China
Man this info is invaluable. Well done great stuff.
ReplyDeleteI would realy realy like the scene file to experiment with, if you have the time to send it.
Cheers
Paul
ozone@aapt.net.au
Hi, great stuff. I got me the pdf of this at 3dtotal. There are some file fixes I posted at the threedy forum http://forums.3dtotal.com/showthread.php?t=60532. Cool stuff, hard to grasp at times. Not only making sense of FG GI PhSky but also the Gamma corrections and matching framebuffer previews... sigh...
ReplyDeleteAnyway... Tons of appriciation for putting effort into this.
great stuff. Could you send me the scene file? My email address is www.softwaremaya@yahoo.com .thank you very much.
ReplyDeleteHello!
ReplyDeleteReally wonderful Tutz!! enjoyed reading it.
Could you please send me the scene files and materials if possible.
Regards
/Nordin
noredin@bredband.net
Hi,
ReplyDeleteits nice tuts
can i get the maya file so that i can try that
I will be very thankfull..if u mail me bishtmahesh1@hotmail.com
Thanks
fantastic tuts, many thanks! Mind if grab the scene file? cedrick@hyperstrike.tv
ReplyDeletethanks,
Ced
Hi,
ReplyDeletetutorial looks fantastic
would love to give it a shot
It would be great if I could have the scene file .. Thz
charithcmutt@hotmail.com
Nice tuts really good stuff
ReplyDeleteplease send me maya file thanks
ovais_os@hotmail.com
hi, I love this tut, I was wondering if you can send me the scene file too, I'm using Maya :)
ReplyDeleteThank so much for your help :)
jamescarr8@gmail.com
really awesome tuts
ReplyDeleteplease you can send me maya file
thanks
lohita4enter10@gmail.com
Hey..u r really good yaar !!
ReplyDeleteactually, it would be gr8 if i had dat scene file,.. u know..!
but spectacular work, i must say...keep it up !!
shalvi.gurav@yahoo.com
Hi, Im loving these tutorials. im normally an animator but need to brush up on my lighting skills, would it be possible to send me the scene file?
ReplyDeleteIf so please send it to andyjebb@aol.co.uk
Thanks